Category Archives: Uncategorized

How to Choose the Perfect Color Palette for your Home

Your home is a feeling not a place. Choosing the perfect color palette for your favorite place in the world doesn’t have to be difficult.

I know it can intimidating picking from millions of colors and then hundreds of different shades of the same color when choosing paint for your home. Deciding on the perfect wall color can really set the tone and feeling of your room. To help you when looking for a color combination that will work I have a few tips.

1. Go look at your closet~look at the colors of clothes you usually buy and wear. This is a good indication of colors that you are naturally drawn to and make you feel good.

http-::chiccoastalliving.blogspot.com:2011:06:my-closet-inspiration http-::www.whowhatwear.com:tools-you-need-to-organize-your-closet


2. Head to the fabric store and grab a few samples of some of your favorite patterns. Use this to pull colors that you like. You can even have Home Depot or Lowes scan the color you like and custom create a paint for you:) I’ve done this before and they do a great job of color matching.

4c00a24cf78476aa473c970299cf34f1 bf18774b37bb0144ef3189be21aad624 b7deefc56b0decd647abba6fb83b18b7

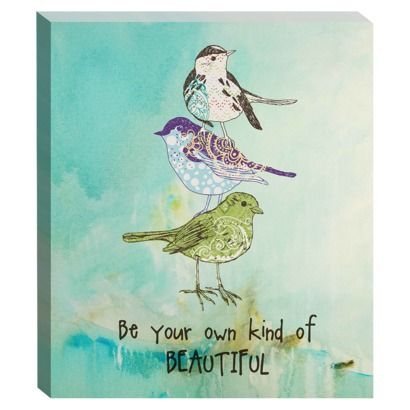
3. Purchase your wall art pieces you want to use in the room for inspiration. You can even print them, instead of purchasing right away, and tape them to your wall. Stare at them for a few days. Purchase a few color samples and paint small areas around the art work. This always helps me. Bonus..paint is 100% returnable! Just don’t use the whole can

b4be93cae44a625064f65e4aac0541b5 72b25d865fe8de93dcd8ee22aa9ba355

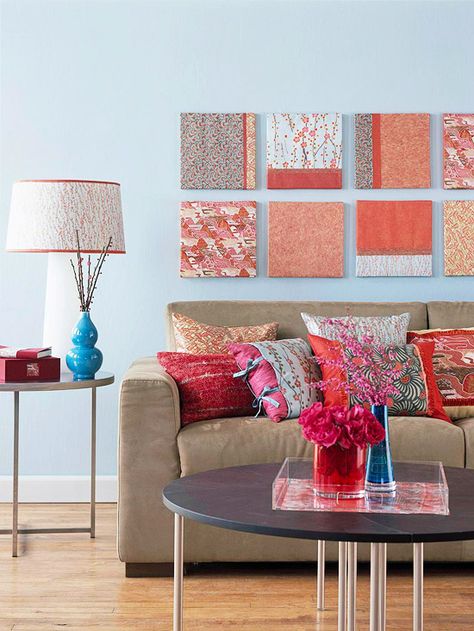
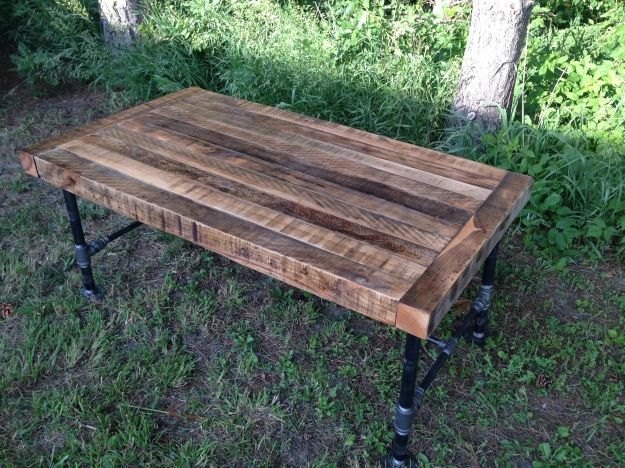
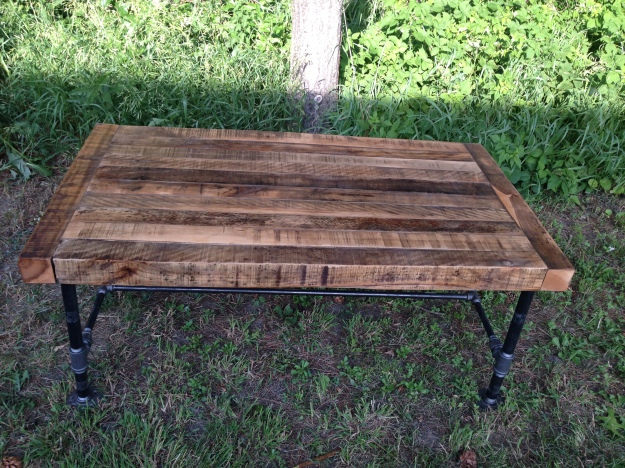
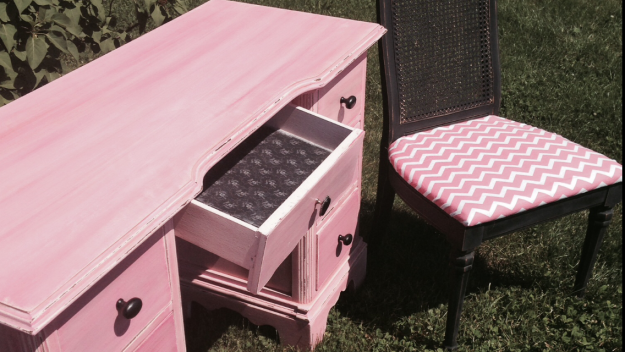
4. Make your big purchases before choosing a paint color. Do you want a white couch, a red accent chair? Maybe you want a green china cabinet or a walnut kitchen table. I always recommend keeping your big items neutral and adding color with fabrics like pillows, curtains and rugs. These are less expensive to change and can make a huge difference. It’s the easiest way to make your room feel comfortable, inviting or even new. It can create a whole new look in seconds.

couch

p c

5.  Use the color wheel to choose complimenting colors.

bde2e25473ce3c2fc4bface1cc7e67d5


6. Last but definitely not least. Check out this awesome website. They offer tons of color combinations and they are sorted by theme, which is my favorite way to search the site. You can also change the values of the colors to add pigment and take it away. They will offer you colors that easily match your favorite.

I think the most beautiful color combinations are found in nature. The next time you are in an inspiration funk take a walk or go for a drive. Visit the beach, the park, a flower shop or a vegetable and fruit market. The stunning colors combinations will surprise you and hopefully give you the creative encouragement to find the perfect colors for your home.

bbb flow fruit


Aren’t all of these color combinations gorgeous?!! My personal favorite is the beach photograph. What’s your favorite?

Do you have a no-fail plan for choosing colors? If so please share with us, we would love to hear your ideas. And remember, your home is a feeling not a place. Don’t rush perfection:)

Jeanette Marie

Some of the Best of the 4th of July


As the Fourth of July gets closer I am loving all the red, white and blue I am seeing everywhere. I wanted to share a few of my favorite decorating pieces and items. Enjoy!!

0711-Flag-Chair-s2Found at the Cottage. A Patriotic chair for about $1300   WOW!

oPottery Barn table cloth on sale for $27.00

img53bPottery Barn personalized plate for $37.00 

patriotic_plates-r1aa8d866ee9e429e9b8f60ad7058ba68_ambb0_8byvr_324Really cool patriotic plates from Zazzle for 26.95

wallDecorative wall art for the house or the wood fence in the back yard. Found on Amazon for $21.99

butPretty butterfly garden decor found on Amazon 27.97 for a set of three


flagYour very own flag to fly in your yard from Toland Home garden for 10.98

bowlsSet of three patriotic tin bowls found on Amazon for 27.95 

collectionsHanding patriotic decor found on the Collection Etc. for 10.95

solSolar powered garden and yard decorations found at the Collections Etc. for 7.95 each

balA bouquet of balloons celebrating the 4th from Party City for 15.99

Sweets_Buffet_Patriotic-8976Party City, all decor sold separately

floatPatriotic Float kits from Shindigz  for $349.99. I would love to build a family float for the 4th and take it down to my local parade! But what to do with it after that??….

lNDLand of the Free banner found on Etsy for $22.00

propsPhoto booth or just fun photo props representing some of the things we love about the 4th of July! Found on Etsy for $25.00

masonYou can get these from Baycreek Boutique! Let me know if you are interested in a set of Patriotic Mason Jars

wall flagWooden wall flag from Trendy Tree for 14.99. You can hang this art all year round:)


pillow

An easy way to incorporate some patriotic decor. Toss it onto a rocking chair on the porch or your couch. Found at JinStyles for $22.00

100142775.jpg.rendition.largest

Better Homes and Gardens decorating ideas. I love the simplicity of this style. I know some love the SPARKLE that the 4th brings and go for a more blingy style.

The Fourth of July signifies Americas Independence!  The red in the American Flag represents hardness and valor.  The white signifies purity and innocence. The blue signifies vigilance, perseverance, and justice.  Our flag flies high friends!  Spend time with your family and enjoy the fireworks!

Jeanette Marie


DIY Rustic Coffee Table

Hello Baycreek followers, friends and family.

Mike here, the life partner of Jeanette Marie. In this blog we will give a brief yet informative step by step tutorial on our rustic reclaimed wood and plumbing supply coffee table.

DIY Rustic coffee table with black pipe frame

First off you need to acquire the supplies. Heres the full list

  • reclaimed wood or new wood painted the part-enough to cover your base  roughly 29″x52″
  • plumbing supply pipe black or galvanized pre threaded in several lengths and sizes.
  • 1) 48inch 1/2inch diameter pipe
  • (4) 6inch 1inch diameter pipe
  • (4) 10inch 1inch diameter pipe
  • (4) 1inch tee fittings
  • (8) 1inch floor flanges
  • (4) 1inch close nipples
  • 4) 1inch to 1/2inch reducers
  • (2) 1/2inch tee fittings
  • (4) 8inch 1/2inch diameter pipe
  • (1) large container of Elmer’s wood glue
  • (1) package of 6inch deck screws
  • (8) 1/2inch by 12inch lag bolts
  • (16) 1inch long lag bolts for flange.
  • (1) 3/8th by 12inch wood drill bit
  • (1) 6inch drill bit for pre drilling your deck screws
tools needed for a rustic coffee table

tools needed

Sounds like a lot I know but it’s worth it. The total cost should be around $100 not including your wood. Quick fyi you could use 2x4s on end(standing up) or 4x4s. We used reclaimed hardwood from steel haulers already beat and weathered to perfection. Our wood measured 3×3.

reclaimed wood for tableStart off by putting your plumbing base together, I actually did this in the store. And yes everyone was looking at me like I was crazy.. I started with the 48inch pipe and worked my way out to each leg in this pattern:

(a) connect your 1/2inch tee fittings to your 48inch pipe on each end.

(b) next connect your 8inch 1/2 inch pipes to each side of your tee fittings.

(c) now place your reducers on your exposed ends this should all be tight and lay flat on the ground.

(d) place your close 1inch nipple into the reducers. don’t use pliers or a pipe wrench on the exposed threads you can tighten the connecting parts to your liking.

(e) connect your 1inch tee fittings to your close nipples tighten till the tee openings face up and down.

(f )connect your 6inch pipes to the bottom of your tee fittings and cap them off with the floor flanges.

(g) connect your 10inch pipe to your top tee fittings and cap them off with your remaining floor flanges. your base is now ready for your custom table top. make sure to tighten  all fittings for stability and safety.

black plumbing pipe used for table

After choosing your lumber you can start by cutting your boards down to your desired lengths. We wanted a slight over hang with capped ends on our table top. We needed 53 inches to cover our base. We had to lay our lumber out to find the ideal pieces in a certain order for color contrast. Keep in mind wood tends to cup, bow and crown so the lay out is important the flatter they lay together the better. This will minimize labor later. 

For this next step you will need a drill. Two drills would be ideal. One for drilling and one for screwing.  Both drill bits (see list above) for your deck screws and lag bolts. You need clamps and wood glue. Start by placing boards in sets of two and glueing them to one and other. You don’t need a ton of glue, one pass at the center is enough. Screw them together about two inches from the ends. Pre drilling the screw hole first makes it easier and ensures your wood doesn’t split. Do every set of screws the same using uniform screw placement. This is critical because your screws will show on the edges of the table. You will want a pattern. We used 3×3 lumber so the 6in screw penetrated both boards but didn’t pop out on the back sides. 

Now lay your table top sets in order. We had five sets of two. Take two of the middle sets and clamp them together. Mark two spots 7 inches from the ends. Drill counter sinking holes about 1 inch deep. Next drill two pilot holes inside of your counter sink holes with a 5/16ths by 12in drill bit. Adding your lag bolts is tough but your table will be bullet proof!!! I used a nematic impact and a ratchet to do this part. Continue this step until all your sets are attached making sure to off set lag bolt placement on every set as the table top is attached.  On your outer set place your lag bolts uniform on both sides. They will show.

How to build a sturdy table with reclaimed wood


reclaimed, reused, and recycled wood projects

DIY table with barn wood

Last we flipped the table top over and placed the plumbing base on top to attach them. We used small lag screws half the thickness of your table top for stability.

To finish off our table it received a really vigorous  sanding job, some stain and poly to seal it. Quick tip~ we wet sanded the top to fill in some of the gaps with saw dust.

how to sand a barn wood table

sanded barn wood table for reclaimed table ideas

beautiful and rustic table

This was a tough project because we wanted a butcher block look for the top of our coffee table. If using 2×6 lumber  you could use metal brackets to attach your boards together.  We wanted the bulky industrial look so the extra work was worth it. because this table weighs over 100 lbs we lag bolted the entire top.

rustic table, restoration hardware

reclaimed rustic table DIY

rustic table with poly and black pipe

Thanks for checking it out. Work safe, lock the windows and wear protection!

Mike B


Milk Paint directions for the Beginner

OMG! I am totally in LOVE with milk paint. This is the first piece I have ever refinished with milk paint and it turned out better than I anticipated.  Its gorgeous. Its not everyday that that happens when trying something for the first time.

I had heard horror stories about this paint from a few people. One friend in particular had told me about her experience after I explained to her that I had planned on using it. She told me she didn’t have very good luck with this paint. Her whole piece flaked off and she had to start over. Thats a lot of work! to paint something and then have to sand the whole piece again and start from scratch.

So imagine my concern when I decided to try this paint out for myself..NERVous;/ I don’t particularly love the sanding part of refinishing so setting myself up for that extra work wasn’t very tempting. But I had gotten a pretty good deal on this desk and thought it was the perfect piece. Plus, Mike has stacked my unfinished pieces so high in the barn that this was the only one I could get to without killing myself;)

I did quite a bit of research, youtube, the web..you name it. I felt confident… prepared is a better word.  I was ready for the chipping process to occur and was ready to welcome it! everything I learned said this paint is unpredictable. You can never be sure of the finish. Be flexible..Imagine my surprise when the paint stuck better than chalk paint. It was quite a job to sand this paint off my piece. Did I mention that I adore this paint?? because I absolutely do! typewrite milk paint Here is a pic of the piece while I was sanding it. refinishing a desk to stain the topThis desk was in rare form! But I sanded the whole thing with a nematic sander and prepped it for the milk paint. I used Miss Mustard Seed Milk Paint that I purchased from The Purple Painted Lady in typewriter. It is a black color. I was actually going for a grayish color but I added to much pigment. This paint comes in a powder form..yes! a powder form!! Definitely different than any paint I have ever used before. When I learned that I was even more skeptical.

You buy the paint (powder) and you mix it with water. (I used warm water because I think things mix better in warm or hot water) Not in the directions so don’t really know if it matters. I also used the bonding agent on this piece. Thats is also a choice you can make. The bonding agent helps the paint adhere better to surfaces but doesn’t ensure that it will. If you use the bonding agent make sure you let the first coat dry for at least 2 hours. Otherwise you might reactivate the bonding agent in the paint. (I didn’t do this..I never listen!! so bad I know but my second coat went on fine) The white color in the paint dries clear, thats the bonding agent. (if you don’t add the bonding agent dry time is about 20ish minutes)

milk paint with the bonding agent

The white color dries clear, its the bonding agent


typewriter milk paint

you have to stir and mix this ALOT. I used an egg beater and stirred the paint every so often while painting.

The paint looked totally weird going on. Its really watery and runny. Not like other paints I have used. This wasn’t very comforting. The directions say to add equal parts with this paint. so for every scoop of water you add a scoop of pigment. As far as the bonding agent you add as much as the milk paint you have made. So it doubles your paint amount. I only added 8 scoops of pigment in with 12 scoops of water. Then I doubled my recipe with the bonding agent. I wanted a grey color so I added less powder to the water. Still turned out black but a PERFECT black!

Here are some pics of the wet paint. I had a bleed through and sprayed with ploy before the next coat of milk paint. The milk paint covered the spots perfect after that.

milk painted desk, looked blue when wet

It looked blue when I was applying it

The milk paint dried really chalky. Every time I touched the piece it left finger marks. I distressed all the edges and then waxed the piece with furniture wax. The color really popped after I applied the wax and the paint completely soaked up the wax. It looked so smooth and vibrant. No more finger prints!

one coat of milk paint

1 coat of the typewrite milk paint with the bonding agent

milk painted desk. black with a stained top

after the wax was applied, see the color just come to life!

I stained the top and sealed with poly.  Isn’t it a gorgeous refinish! Hopefully all my milk paint projects go this smooth:) I will definitely be using it again,  so I’ll keep you posted.

Want to see more pics?? Me to;) gorgeous milk painted dresser gorgeous milk painted desk beautiful refinished desk with milk paint. how to use milk paint Thanks for reading

Jeanette Marie

Everything a girl loves..shopping, boys and PINK!

I received an email from a client explaining that she wanted a pink desk and black chair for her daughter.  She asked me if I had any unfinished or unspoken pieces  available and I told her “Yes!”  Then we emailed inspiration photos back and forth and she loved ALL of them:) It took her awhile to decide on the finish but when she did I was excited to get started.

Now, pink and black are not my favorite colors and if I had painted this on my own to sell it I would NEVER have painted it in this palette. But, the customer is alway right…so I went to work.

The first thing I did for this piece was remove the hardware and sand everything down.  I had to sand a lot on the front of the drawers because the old handles had left indents (I knew I was adding new hardware). I did have to fix a few drawers where the dovetail had come apart.  I did this by filling the dovetails with wood glue and using bar clamps.  I also had to address some issues where the top layer veneer had separated from the wood on a few drawers.  To fix this I inserted wood glue underneath by using a tooth pick and pushing the glue into the cavity as far as it would go.  Then I used a piece of wood to put pressure on the area and clapped it. This sat overnight to ensure proper drying time.

IMG_3318

IMG_3319

Next I sanded the excess glue off my drawers and wiped down the desk.  I jumped in my paint booth and sprayed my first coat of paint.  Spraying furniture is an art in my opinion.  It takes a lot of practice and patience. My fiancé and mother in-law have taught me well:) The first coat was a light pink color. The second coat was the same color. The third coat was a few shades darker.

The next thing I did was wash this piece in a shade even darker than I had previously used. Then a shade lighter, then the original pink color(first 2 coats) then the color of the 3rd sprayed coat.  Lastly, I lightly white washed it and dark waxed it with Americana Dark Wax.  It has so much depth and color variation, its really pretty!


A similar pink color palette I used for this piece.

I similar pink color palette I used for this piece.


I distressed the edges in spots that I think would naturally be worn and decoupaged the drawers. I used mode podge to adhere the paper and seal it.

For the chair, I used black paint (made into DIY chalk paint). I painted 3 coats and distressed it to show the gorgeous wood color underneath. My next project will be black! I loved the way the chair turned out.

IMG_4270

IMG_4271

IMG_4269

I have to say that in the end I absolutely LOVE-LOVE this refinish. It was outside my comfort zone and really made me work. Her vision has inspired me to try out some new color combinations and you will see these soon!

Thank you for reading.

Show you care and share!


Jeanette Marie

Recycled Dresser Drawers

Hi everyone!

After my last blog, the one where I almost burned my dresser:/    I decided to look up some recycled drawer ideas..You never know when you might find yourself in a situation where you have 6 extra drawers laying around.  These are so cool and unique that I think everyone should have at least one in their home or garden.

drawer thecottagemarket thecottagemarket

d ilovethatjunkilovethatjunk

d bhgbhg

d thediyadventuresthediyadventures

d pureandnoblepureandnoble

d keltainentalorannallakeltainentalorannalla

d a-ladys-findingsa-ladys-findings

clothes-hangers Design*Spongedesignsponge

pink porchpink-porch

honeybearlanehoneybearlane

d architecturaldesignsarchitecturaldesigns

dHe looks comfy in his drawer:)

Thank you for reading

Share this really cool post!

Jeanette Marie

Dry Brushed Dresser

Today I am going to talk about a dresser that was purchased for a nursery.  The client also asked me to refinish a changing table to match! They purchased this not knowing the sex of the baby and thought this was a great color palette for the room. You know how it is when you are expecting your first child! You are MORE than prepared and have a need to be ready at all times:)

I remember being pregnant with my first, Kaylie, and I went to register for the shower. I had NO idea what I was going to need, but everything looked absolutely essential! So, I scanned away..I registered for enough to take care of 10 babies. HA! I got the huge stroller with the matching car seat that doesn’t fit with anything else in your trunk..used maybe 10 times. But hey! you never know. As soon as I found out I was having a girl I started buying clothes and painting her room..decorating it, then redecorating it..I was bored after I was 6 months pregnant! I had taken care of everything. I had picked her doctor, her hair color and her profession! Memories:)

Image

Back to my dry brushed dresser..This dresser was in PERFECT shape! I sanded the whole thing and painted it white. I then took grey, blue, green, white, and tan to use for the color on the drawers. I dipped the TIP of my brush in each color, I didn’t even change brushes, and went in a big circle to coat each drawer. It took a long time! You have to use a tiny amount of paint and all your colors for this to look good. And remember to just dip the very tip of the brush in each one. It will look funny in the beginning but by the 20th time around it will start to blend together and you can see the different shades forming.

IMG_3657

Here’s where we all learn from my MISTAKES! My first encounter with a bleed through( a yellowish or pinkish stain that NO amount of paint will cover).  It is a common cause in pieces with wood that has tannins or some darker red woods that haven’t been properly sealed. It is U-G-L-Y!! And you never know until it to late!

The yellowish bleed through. Its not a great pic but it definitely icky yellow.

The yellowish bleed through. Its not a great pic but it definitely icky yellow.

I went out the next day, after the dresser was painted and noticed yellowing in certain areas of the dresser. What a bummer..Now I get the pleasure or sealing the dresser with polyurethane and painting it white again.  I sprayed the dresser with poly and repainted it. Wouldn’t you know that it bleed thru AGAIN! UGGGGG!!! I didn’t think I would need more than one coat, or a least I didn’t want to need more than one coat..So I sprayed it with poly again, and then once more because I was not going to keep creating double the work for myself. (I should add that I sanded with a 120 grit in between each coat of poly..important step.) The next coat of white covered like a blanket:) If it hadn’t, I was going to burn the dresser! Just kidding..I would have saved my pretty drawers!! HAHA

I posted this piece on my Facebook page just to let everyone know what I was working on and got the email from Craig and Nicole. I explained the dresser wasn’t done yet, I still had to distress it or do something else to it..Change the color of the handles. Sometimes I just don’t know when t quit. They said they loved it as is, so the piece was finished with poly and picked up by its new owners. I hope this dresser serves their baby well:)

IMG_3664

IMG_3663

I WANT TO SAY CONGRATULATIONS AGAIN TO NICOLE AND CRAIG! What a blessing a child is and I want to share a little quote with a big meaning. “Making the decision to have a child is momentous. It is to decide forever to have your heart go walking around outside your body.”
Elizabeth Stone 

When I refinish the changing table I will take a video so you can see the dry brushing technique I use.


Thanks for reading!

Show you care and SHARE


Jeanette Marie 

French Inspired Buffet

Excuse my French but this beaach is gorgeous!!! IMG_4020 I purchased this super ugly buffet and everyone was like why would you buy that!?? To be honest, I didn’t know why I bought it either. Except the fact that I want to buy every sad piece of furniture that I see for SALE!!!  No furniture is safe around me! I will chalk paint it, milk paint it, color wash it or whatever comes to mind when I see it.  I can always envision something stunning when I look at an old antique piece of unloved furniture. The hard part is making up my mind! With this piece I started out wanting something really clean and fresh looking.  I knew I wanted to use my french inspired stencil I purchased.  I had it for like a month and was waiting for the perfect piece to use it on:) And then I met her!! My ugly waterfall buffet table. Here is a picture of her when I picked her up. IMG_3907 The bones of the buffet were in really good shape. I removed all the hardware and lightly sanded the whole piece. Then put my first coat of paint on.  Instant MAGIC I tell ya!!! Looked better after just one coat of paint. I used a linen white color.  There are tons of variations of white out there to give you a headache over, so I did the ini meeny miny moe trick and bought a gallon.  If you haven’t used this nifty little rhyme to help you out, give it a try;) It never fails and always produces an answer;) So, I painted 3 coats of my white color on the buffet, let each coat dry completely in between, and grabbed my stencil. I didn’t have stencil paint so I mixed some plaster of paris in with my flat black paint, to thicken it up, and headed over to my piece.  I taped the stencil down, this is imperative, and used a small brush to dab and brush the black into the stencil. It took quite some time to finish because you have to dip your brush, then dab your brush onto a paper towel (or whatever you have) to get the excess off the brush. I also dabbed the brush on a paper plate after just to be sure I wasn’t getting to much paint.  I didn’t want it to bleed underneath, and I wanted it to looked stamped. I waited for the black paint to dry and then lifted my stencil.  It was so pretty and so WHITE!

White buffet before I dark waxed

White buffet before I dark waxed

It's so cool!

It’s so cool!

I did not by any means hate the piece like this but I did remember seeing something by the Purple Painted Lady that I had fallen in love with.  It was a dresser she had finished with a typography transfer on the front.  It was a stunner!! To check it out yourself click here.  It is the center piece of her headline picture on the front of her page.  She must have loved hers as much as I loved mine!! So while I am standing there staring at the buffet and wondering why I feel like its missing something, that image popped into my head and I went for it!! For the finish I used Annie Sloan Dark wax. It was my first time using it and I did have a few freak outs with this wax.  It is super thick and does not spread easily. It was really frustrating until I realized that I should mix the dark wax with my clear wax to allow me a little more time when adding more and removing some. It was most definitely a long process for me.  I also skipped the clear wax step for this one.  The clear wax is a critical part when dark waxing your pieces.  If you skip this step it will actually change your paint color. It will stain the color and it is irreversible. I skipped the clear because I wanted this to look old and worn.  I wanted the color to take on a deeper almost dirty hue.  I added more after the first coat dried, and then removed some from just certain areas to give it the color depth you see here. I removed a lot from the center and left the edges darker. IMG_4015 Lastly I went to Hobby Lobby and purchased new hardware, which is always 1/2 price now!! woohoo!! When it was all finished I took the buffet outside and snapped tons of pictures! This piece has gotten so much interest from everyone who saw it. I received awesome feedback on the French Inspired Buffet!! I really hope you like it to.

IMG_4025

Sorry about the shadows in this picture. The top is covered in them.

IMG_4024 Thanks so much for reading:)   Jeanette Marie

Mason jars “on deck”!!

I have been super busy today painting up mason jars for Ka’bloom Flowers and Gifts, a florist in Sylvania, Ohio.  Mathilda, the owner, has already purchased a dresser from me and has it displayed in her shop:)  Sylvania is having an art show this weekend and she thought it would be a great idea to have some mason jar flower vases and a piece of furniture from Baycreek Boutique Home Decor for sale in her store. I have to say, I couldn’t agree more!!

Ka'bloom's display dresser they purchased from me!

Ka’bloom’s display dresser they purchased from me!

So, here are my super cute mason jars I have been working on all day! There’re so pretty..OH! so pretty.

Image

Image

Image

Image

IMG_4202

I am selling Mason Jars now because I think they are a really cool addition to any home.  They have so many uses and are very unique when painted. I plan on doing quite a few things with these jars when I find the time!  The jars are selling so fast right now! Everyone loves them. Shoot me an email if you are interested! I can paint them any color you want:) The jars are all sprayed so the finish is flawless!! I love all of them and I love them in every color I have painted so far.

IMG_4181

What a great idea for the summer!! Order your set today

SUMMER   TIME   IS   THE   BEST   TIME!!

Summer is FINALLY here!! I really thought we were never going to see warm days again after this long and cold winter we fell victim to this year..I had cabin fever so bad I actually cleaned my shower heads one evening. I took them all apart and very meticulously cleaned each one! BORING!!!!

Last weekend I removed the lids off my Jeep Wrangler and joy rode around with my 9 year old daughter. It was great fun and I am so super excited to feel the warmth of the sun, as I am sure you are.  It’s time for picnics, beaches, hammocks, reading under a tree, barbeques, and bars that have their patios open!!!!


Kaylie Michelle and Owen Michael..MY LOVES

Kaylie Michelle and Owen Michael..MY LOVES

♥♥♥They were hanging in the sun and she was singing to him♥♥♥

Anywho..lol..if you happen to be in the Ohio area you should swing by Ka’bloom Flowers and Gifts to say hello and check out their cool spot right downtown Sylvania! Tell Mathilda I said HELLO!!

http://www.kabloomflowersandgifts.com


Thanks for reading and see you next time!

Show you care and share!!


Jeanette Marie

Tall Boy Dresser

Oh man!! What a great weekend:) We barbecued, fished, shopped, went to the beach, painted furniture and attended a beautiful Memorial Day service. My daughter Kaylie actually had the honor of reciting the Pledge of Allegiance at the Memorial! To say she was super excited is an understatement..haha

I honestly do not know where she gets this presence about her..She loves to be the STAR!! She shines when everyone is watching her.  She really turns on the charm:)

I remember being in 3rd or 4th grade and we would say the Pledge of Allegiance in school over the P.A. system.  Everyone wanted to be chosen as the VOICE and we all squirmed in our seats until the lucky winner was picked.  The day I got picked I was so excited! I ran all the way to the office and waited very impatiently.  The next thing I knew a microphone was being shoved in my face and I panicked! I couldn’t speak..Literally, my mouth didn’t work and the principal ended up doing the honors.  I panicked, no audience..just the idea that all of my friends could hear me.  My daughter is the complete opposite and I am grateful for the confident young lady she has grown to be.

Now, lets talk about a piece of furniture that was definitely lacking its rightful presence in the world. He was boring and crying for help;)

Dusty Tall Boy Dresser Before

Tall dresser Before Picture

This dresser was in perfect condition. I mean impeccable. It doesn’t get better, the drawers were perfect on the inside and the piece itself had no scratches or marks.  So, I thought..what should I do with this gorgeous piece??

I didn’t really want to distress it to much or make it look like something it wasn’t.  I needed it to say MAN to me.  It just screamed I don’t want to be a boy anymore..It needed some masculinity.

So, I headed to the paint department and debated my millions of color choices for far to long, then finally decided on Perfect Storm. I started the project by removing the hardware and doing a light sanding to the entire piece.  I wiped the dresser down and used an air hose to get the surface clean and went to work on my first coat.

I always make my paint into a DIY version of chalk paint. I use calcium carbonate and latex paint for the DIY mixture.  I used a little less carbonate in this mixture so it still maintained just a slight sheen. I wanted the color to look rich and deep.  I have done another blog on all the different DIY recipes and the finishes.  I have also added in some experiments I did because I had quite a few questions when I began to use this mixture.  The blog isn’t finished yet but I promise to post soon:)

Image

The first coat covered Like butter! Seriously, it looked fab with just one coat..Two coats later I was looking at a dark teal dresser that still wasn’t quite happy with the outfit I put on him. I waxed the piece and used a glaze (glaze I mixed with black paint) to add depth to the details of the dresser.  I then distressed just the corners and the trim work where it was raised from the drawers to let the original wood show through. I painted the handles in a flat black finish and VOILA!!  My Handsome Dusty Teal Tall Boy Dresser was ready for his photo shoot:)

I posted him for sale on my Facebook page and he was snatched up quickly.  He will now reside in St. Joseph, Michigan and I couldn’t be happier.

Image

Image


Image


That’s it for this busy girl! My next project is a gorgeous refinish of an antique dresser with tons of details! I am working closely with the client to give her the perfect piece for her 1 year old daughters room:) Its going to be stunning!! See you next time and Thank you for reading.

Jeanette Marie

Show you care and share